Pages

Monday, June 23, 2014

Quinoa with kale

Because it is just delicious!

Fried kale was the only green my mother would be able to get inside my belly. I wasn't crazy about it, but with eating less fake flavors and tasting more the real ones, I fell more and more in love with it. I bet my mother didn't see that coming :-)

Really, this is the best kale recipe I know. Although quite different from my mother's, which uses garlic, it still holds a resemblance to the original since has that kick of the same family - onion!

I personally find that this matches very well with quinoa (as any other edible greens, perhaps a bit more) and a hint of soy sauce might make you go for seconds.

Well, like my mother once said over a giant, scentful, richly sweet jackfruit that we just opened, let's not waste time talking :-)


Quinoa with kale

LingQ


Ingredients
  • 1 cup quinoa
  • 3 cups water
  • 1 big bunch of kale, finely chopped
  • 1-3 onions, chopped
  • 1 bit curcuma (turmeric)
  • 1 drizzle soy sauce (optonal)
Cooking Directions
  1. Add the quinoa and the water to a pot with a matching lid and bring to a boil
  2. Lower the fire and let it simmer for 15 minutes. Meanwhile prepare the kale.
  3. Fry the onions until transparent in a bit of olive oil.
  4. Add the kale, stirring constantly, until it goes soft enough.
  5. Enjoy!

Sunday, June 15, 2014

Grilled meal

The picture says it all :-)
Is there anything better to do with a grill?

The sweet mild onionness lends itself very wll for this recipe that bathes in crafty pastured pork sausage juices, with it's herbiness pulsing from the inside, and the zucchini that feels soft and fresh, the bell pepper that always has a marking presence and the eggplant that embraces the garlic like her own child, not minding all the oily sweat from playing outside.

I recently got a grill + waffle iron + croque monsieur maker and I've been enjoying every moment. It is tiny so I need to use it three times for a plate like this but it is very tasteworthy!

Needless to say I went to make a second batch.

Here is what I've made for two:


Grilled meal

Ingredients
  • 3 medium onions, sliced, 1 cm (0.4 in)
  • 2 chipolata sausages
  • 1 bellpepper, in strips
  • 1 zucchini, in 1 cm (0.4 in) slices
  • 2 eggplants, sliced, 1 cm (0.4 in)
  • 3 finely chopped cloves of garlic
  • 1 bit of olive oil (you can mix the garlic with olive oil on forehand to release the taste better)
  •  Himalaya salt

Royalty Free Stock Photography
           

1. Top the eggplants with the garlic and olive oil.
2. Sprinkle salt over the eggplant and the zucchini.
3. Grill it all until done; the veggies will be ready around the same time as the meat. I didn't need to add oil because it is a non-stick grill. Make sure the onions are cooked through and the sausage doesn't release any liquid anymore. The zucchini doesn't need the grill marks to be ready.

If you want some carby side, clean the grill with fresh bread or sprinkle the juicy deliciousness over freshly made rice (or us it along with a bit of oil to fry yesterday's), otherws drizzle the juice over the veggies.

P.S.: It is a great cutlery-free picnic food!

Friday, June 6, 2014

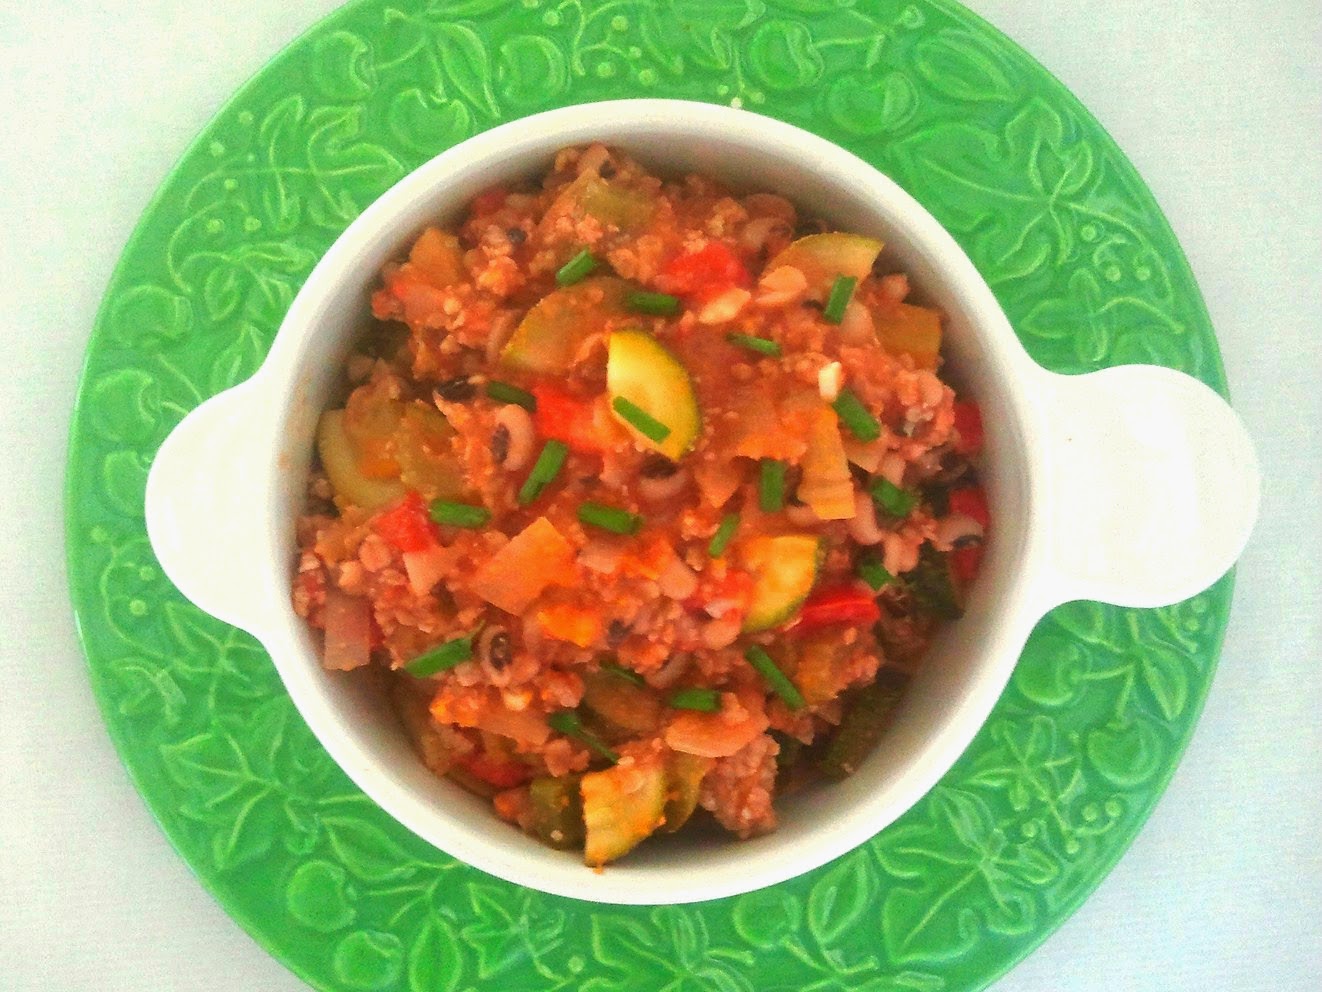
Black eyed peas healthy chili


I remember the first time I ate chili; we were starving after hitching to the Sfinks world music festival in Boechout, close to Antwerpen, and food was not allowed inside so we had to drop our bags at a nearby bar (not that we didn't at before coming in, but hitching can use a lot of energy!). There were wonderful food stalls and the most appropriate fuel there was chili (can't survive on pancakes!)

It was our last money and it was well spent :-) We had train tickets for after those two days partying and hanging out with supernice long-time-no-see friends of my husband and sleeping in the bushes after walking around in the middle of the night. We were planning to go picking cherries afterwards but it was raining like something broke up there and we didn't go (I'm glad, I'd pass out after arriving, I was really tired).

Royalty Free Stock Photography

We lived on a few pots of chili and that was a great fuel; in the morning I even tried to reproduce it with cans of foods but there is nothing that beats slowly simmred chili, where the flavors really brew and blend like there is no tomorrow. But there is always tomorrow, tomorrow's chili and tomorrow's party (even if that means being cozy in the couch with buttery popcorn). The chili you cook today is tomorrow's, because even though it is amazing and mouthwatering when freshly cooked, it is twice as much in the next day, or at least a few hours later. It was a little on the dry side but very tasty anyway! I will definately make it again.

Well, I love foods that bring sweet memories. I created my own version of chili (with a bit similar flavors but more and different veggies), after buying a package of black eyed peas in the new Turkish shop here. I have never eaten it before, so I had no clue what to do with it.


Here it is:


Black eyed peas healthy chili

Yield: 5 portions (at least)
Ingredients
  • 1 cup (dried)/2 cans black eyed peas
  • 1 big chili pepper or a couple of small ones (can always add chili powdr later)
  • 2-3 cloves of garlic
  • 1 tsp cumin (powder)
  • 2 medium onions
Cooking Directions
  1. If cooking the black eyed peas from scratch: Soak them for 6 hours or overnight, drain and rinse well. Canned: Jump to step 5
  2. Add fresh water, without salt otherwise they will stay hard (it will be added later in the chili)
  3. Bring the beans to a boil, and lower the fire. Add the pork to a pot and meanwhile chop all the veggies, keeping the tomatoes and courgettes/zucchinis apart..
  4. Let it simmer for half an hour to forty five minutes. When almost perfectly soft, drain
  5. Put the pork in a pot, stirring a bit to separate while it is over the fire in the lowest setting
  6. This will make a bit of the fat melt so you can use it to fry everything.
  7. When you see some of the fat melted in the bottom of the pot, add all the veggies, except for the courgette and tomato.
  8. Fry everything in medium high fire until the onion is soft
  9. Add everything else along with salt
  10. Adding an extra can of tomatoes will make it stewier
  11. Let simmer for at least 15 minutes, 25 is better
  12. If you want it spicier add extra dried chili
  13. Enjoy :-)
I got a little help to make a "studio" for my food photo shooting; I will get an extra lamp and looking forward to a decent camera too. It's a lot more of an detailed part of food blogging than I ever thought.

Monday, June 2, 2014

Quinoa with spinach and curry


Quinoa is what I call fast food. In lazy days, that is just what I make when I feel like eating something without the chopping galore, and nutritious enough to cheat and call it a meal here and there (hey, if people already call bread with cheese or peanut butter a meal, this counts too! Not everyday of course). Not that I do that. It is just as easy to throw greens on the pot, but if you would be camping that would still b a great meal in case you don't know or can't find wild greens of your liking.

I think you probably heard that before, but quinoa is packed with proteins and minerals and will digest very smoothly. It feels so light it will almost fool you into thinking you didn't eat something very strong (especially if you are a meat eater). But, believe me, you did. You hit the jackpot of starches. Even though I have an undying love for buckwheat as you can see here and here, I must say I find quinoa the ultimate fast-and-almost-no-dishes food. And, of course, it is a great travel food to replenish those 15km (9 miles) you just walked with your heavy backpack.

Well, this is not really a recipe because it's just as easy as making porridge, but maybe you want to know how to make quinoa nicely cooked, what is the nicest ratio, especially after adding water releasing spinach - the difference between making quinoa almost-soup and nice and fluffy (tastes vary but most peopl would agree on this).


Quinoa with spinach and curry

Cook time: 15 minutes
Yield: 2-3 servings
Ingredients


  • 1 cup quinoa
  • 2.5 cups water
  • 150-300g or 5-10 oz spinach
  • curry powder
  • salt (optional)
Cooking Directions
  1. Add quinoa and water to the pot
  2. Bring it to a boil
  3. Lower the fire and let it simmer for around 9 minutes
  4. Add spinach, as much as it takes to almost fill the pot in case it is a small one
  5. Stir it regularly as it cooks, adding the rest of the spinach gradually
  6. If you don't stir there will be an unstirrable layer of spinach on the top in the end :-)
  7. Wait until the quinoa is fully cooked
  8. Sprinkle with curry powder and sea salt (adding salt afterwards or not at all will keep the nutrient content in the spinach high)


Friday, May 30, 2014

Making the perfect buttery popcorn


I have grown up on popcorn. Plain, with salt, at 3 in the afternoon, almost every day. I just loved it!

I still do. As a matter of fact, it is one of my standard midnight snack (the other is kuttu ki puri). That is the snack for lazy people, easier than the 5 minutes walk to the shop to get chips and much healthier, besides filling you with not much density so it is easily digestible and it won't hurt your waistline.

I have a little secret here.

If you tried to make popcorn with butter before you know how disappointing it can be to burn your last corn and having all the shops closed or far away. Making popcorn with vegetable oil and making it soggy with butter is not really fun.

My secret ingredient is ghee.  That is clarified butter, or butter fat. The butter is simmereed until the solids separate. I will post a recipe in the future, but I need to make it again (I only post tried and tested recipes and for me it was so long ago that I don't even remember anymore). In the Indian or Asian shops you can find it sometimes cheaper than butter itself, in cans, and since it can be stored at room temperature (as far as the tradition goes, and that is how I do) like olive oil and the like, since it has no water it lasts longer. Make sure you read well the package and that you are buying butter ghee, as they sell shortening as vegetable ghee.


Butter popcorn

Yield: 1 quart/1 liter
Ingredients
  • 1/3 cup popcorn kernels
  • 3 tbsp ghee
  • Salt to taste
  • Pot with fitting lid
  • Bowl (optional)
Cooking Directions
  1. Heat the ghee almost on maximum (wait 2 minutes)
  2. Add 3 popcorn kernels
  3. Put on lid
  4. Wait for them to start popping
  5. If they don't after 2 minutes and burn add other 3 kernels, they will pop
  6. When they do add the other kernels, spreading them around so that they are in an even layer
  7. Let them start to pop
  8. If you want to keep them on the pot to save you dishes fill the sink or a heat resistant bowl half as deep as your pot with cold water
  9. If not just sit and enjoy the show
  10. Shake them every two minutes
  11. When there are several (ten to fifteen) seconds between pops add the popcorn to a bowl or pot the pan into the bowl with water.
  12. If you put it in a bowl, enjoy
  13. If you keep it in the pan, wait five to ten minutes and enjoy!
  14. It also works with coconut oil
It's quite easy, and you will probably notice that the ghee will yeld you bigger, airier popcorn. I have tried several oils  (coconut, butter, olive, peanut, sunflower, soya, grapeseed - be careful with refined oils because they carry hexane residues but that is a talk for another post) and ghee deserves by far the first place, and secondly coconut.

I usually make the double for me alone because it is just so good, and it's also great for a picnic in a sunny day (just let it cool down a bit before putting the lid on the container or use a big paper bag after making a couple of small holes in it for thee crunchiest results).

Have fun,

Beet

Tantalizing leftovers recipe, or pizza rice :-)

Cheesy goodness
That was one of the only two ways my mother would get me to eat rice as a child. I was and still am a picky eater, even though my pickiness has changed through the years (I still do run away from pickled cucumbers!).

I like foods that taste real. Tasting real for me is using only ingredients that are unprocessed (veggies!) or very little processed (cheese). Things that you throw together and make you ask yourself why haven't you made that before, and why on earth people buy boxed macaroni and cheese and why do they eat it after the first bite (hunger is the best pickle, they say).

Well, food taste apart, I think everyone needs to figure out what they really love. I have been in culinary blindness for the first 17 years of my life, because all I ate was made in the same way with th same ingredients. And then I took my little backpack and went out in the world and learned what to do with veggies (about time!). I was already interested in healthy foods, and put my foot in to test the waters before I went roaming around, but it was still fairly limited, and that is one of the things that I felt like keeping from then (with my own addition, my "secret" for nearly everything that tastes good, ahem, veggies!)

This is easy like boiling an egg. You can make that with buckwheat or quinoa too, it is a great way to introduce these foods into your life if you find them odd tasting. Do not underestimate their taste power when you add tomato sauce!


Rice and veggies casserole

Ingredients
  • 1 part leftover rice (I used brown)
  • 1 part veggies (leftover or frozen mix)
  • 1/2 part cheese in cubes
  • Tomato sauce
  • Herbs of your choice
Cooking Directions
  1. Mix everything in a casserole pan (hopefully containing one of the leftovers already to save some dishes!).
  2. Turn on the oven at 350F (180C) and bake for 25 minutes or until cheese melts.
  3. Serve warm.
Well, that is it :-)

I think I start getting the hang of making food photos but there is still a long way to go. Living and learning!

Wednesday, May 21, 2014

Simple 5 ingredient gluten free bread

Photo by me
Elated taste buds.

It is real bread, gluten free.

While it worked to make sandwiches with waffles, there is nothing that could compare to a fresh yeast real bread, which I was able to make thanks to Solveig from Gluten Free Vegan Girl. I have tried loads of gluten free bread recipes and that is the only one that made me burst in tears of joy. It is real bread. And gluten free :-)

Royalty Free Stock Photography

I only have one adjustment to suggest; start with three cups of water instead of five. I don't know what superpower psyllium she uses (maybe it is because she uses psyllium powder and I use the husks) but mine is certainly not like that. Psyllium is the thingy playing the role of the gluten, but it is actually good for you and it is even used for helping to flush the intestines.

For the original recipe, check Solveig's recipe here.

Update, May 27: I made them again, and it turned out great! I have put a squeze of fresh orange juice to improve the quality of the dough. Made with 3 cups of water. Bake until very brown on top.

Saturday, May 17, 2014

5 items that will liven up a gluten free pantry

Kuttu ki puri (recipe below), pic by me - use as you wish as long as you link back

After fiddling with a gluten free life for a while, on and off, I figured out some essentials that make my life easier, especially in the past couple of months, when cravings started getting bigger. I have kept myself firm on my eating choices because I feel more and more how eating GF gives me more energy - I used to be always empty of energy and full of things that shouldn't be in me for so long.

While I am not looking forward to eat as much baked goods as before, both for health and practical reasons, I do include some ingredients for it in this list because I, too, help myself out with pastries and sandwiches sometimes, but I am convinced (from experience) that great food can be really easy.

Here are my current top 5 ingredients:

Eggs. Because instead of reaching for a bread, the quick and easy I-am-hungry solution will be those white and yellow bundles of happiness which, by the way, are pre-packed snacks by nature for those active days. Unless you are rich and can afford pre-made gluten-free bread every day, or you are handy enough to bake them yourself all the time, that is the best choice. I don't bother. And eggs are a much more nutritious fuel, by the way. Here is why they will rock your world.

Coconut flakes. It will help feeding your sweet tooth, believe me; and in quite an affordable way if you know where to source your ingredients. I'm talking about making coconut rochers (or macaroons). They are ready in a whisk (and a bake), infinitely easier to prepare and more nutritious than regular standard wheat cookies, and it is a real crowd pleaser. Recipe here.

Rice noodles. Ever present in Asian shops, and definitely more appealing than those corn gluten free pastas in my perception, they are rather affordable (again, know thy shops :-) ). I make pasta sometimes for dinner: a nice veggie tomato sauce (recipe coming up soon), rice pasta for me, wheat pasta for my husband. Quite convenient and you don't have to miss or eat just the sauce with a bit of egg (been there) on a pasta night.

Rice paper. Another great finding from Asian shops, it will give you nice, instant wraps. They are also pretty thin and light so it might be a good travel food, and a yes-yes to take if you are staying over with friends. Great for playing with leftovers and just plain, simple fun! How to wrap it here and how to choose the best rice paper here.

Buckwheat flour. Because making kuttu ki puri is an addiction, and eating it is double as much addictive! Choose the finest flour you can find, read reviews online. I had to wait a while to find a flour that gives the results I want (Doves farm if you live in Europe, I buy it on amazon.co.uk, and I usually hear good things about Bob's Red Mill in general in America). You can also mix half tapioca and half buckwheat and see if it works for you.

Which are your gluten free essentials? Which is your favorite buckwheat flour?

Friday, May 16, 2014

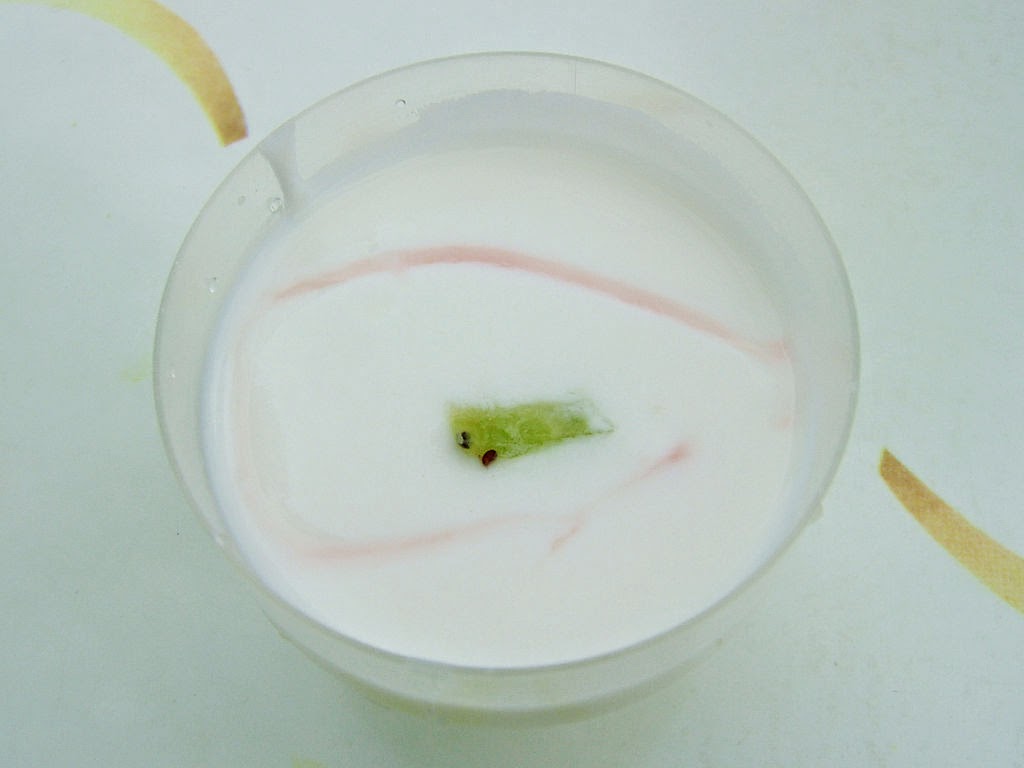
Making yoghurt on a thermos

 http://creativecommons.org/licenses/by-sa/3.0/


I like yoghurt. A lot. I also like to sit back and relax and go to sleep to find myself in the kitchen in the next morning peeking at a fresh batch of yoghurt and that divine good-for-you fermentation scent. I am a yoghurt scent junkie.

And it will save you bucks from buying yoghurt and it will save you space in the kitchen (yay, no need for a yoghurt maker!) and it will save you bucks from buying the machine and it will make you a happy person.

After all, it's an easy way to make yoghurt in small batches, since you are free from the ever-so-lasting temperature checks. It will be fine overnight, you can rest assured, and if your cheapskatiness goes along on your trips you will be glad to have seen this even more.

All you need is:

A thermos bottle/mug (at least 2 cups capacity, preferrably, but works fine if less). If it was used for coffee, wash it until odorless or better choose another, or your yoghurt will smell/taste like it (yikes!)
Milk just enough to almost fill the thermos
1 to tablespoon of plain yoghurt for each 2 or 3 cups (no need to be strict here, just estimate)

Warm the milk until a tiny bit over the body temperature, but so that you can comfortably hold your finger into it for at least 10 seconds. Add the yoghurt, gently whisking or mixing with a fork until it gets dissolved.
Pour into the thermos, close it leaving the lid in the open mode but still covered, and forget it for 8 to 12 hours (nice thing to make for breakfast!). Check the taste then and if you would rather have it more sour just leave it a bit longer until it gets how you like it and refrigerate or remove the lid so the heat will escape.