Pages

Showing posts with label Meat. Show all posts

Tuesday, July 22, 2014

Magret (duck breast), chard and chestnuts


You know those days when you are strolling around the supermarket and find yourself staring at something that you never tried before but heard good things about?

Well, I've had one of those moments the other day. I got duck. More specifically, magret.  Duck breast with a layer of fat. And I had no idea what to do with it.

Here we have a word for these eats, heerlijk. Said heerleeyk.That means divine, but with a lot more foodie appeal. Not that you only can use it for food. It's the way it tastes when you say. Divine sounds more like you are talking about a great piece of music. Or a dress.

Having an nearly endless stream of chard in the garden in this wonder-full fruitful summer, featuring a couple of days of rain and a couple of days of sun and everything all over again - mainly the sun - which veggie wouldn't be excited?

And I figured out the chestnuts I picked and dried last fall were just the perfect starch for this simple but taste bursting meal :-) I'll teach you the best way I found to do that chestnut thing in fall. Now you can find it at a spanish shop (I saw them in the little shop in the little village in Andalucia for the first time like this).

Anyway, here is the recipe:


Magret de canard with chards and chestnuts

Yield: 2 richly filling servings

Ingredients
  • 1 magret
  • 1 cup dried chestnuts, peeled, pick similar sized ones
  • 1 lb chards, chopped
  • 1 tbsp coriander seeds, mashed
  • 1 tsp herbes de provence
Cooking Directions
  1. Rub the magret with the herbs and a bit of salt on all sides.
  2. Start cooking the chestnuts, and boil them for 45 minutes or until soft as you like; wait to drain.
  3. Heat a pan on the lowest heat setting, and let the fatty part of the magret sit there and grease it a little.
  4. Change the setting to high and check after a couple of minutes.
  5. Turn it around when it is dark brown.
  6. Let the other side brown just as much and remove from the fire.
  7. Meanwhile, fry the coriander in 1-2 tbsp lard or what you wish a little bit in the medium setting.
  8. Add the chard, stirring until it wilts.
  9. Drain the chestnuts.
  10. Serve :-)

Sunday, June 15, 2014

Grilled meal

The picture says it all :-)
Is there anything better to do with a grill?

The sweet mild onionness lends itself very wll for this recipe that bathes in crafty pastured pork sausage juices, with it's herbiness pulsing from the inside, and the zucchini that feels soft and fresh, the bell pepper that always has a marking presence and the eggplant that embraces the garlic like her own child, not minding all the oily sweat from playing outside.

I recently got a grill + waffle iron + croque monsieur maker and I've been enjoying every moment. It is tiny so I need to use it three times for a plate like this but it is very tasteworthy!

Needless to say I went to make a second batch.

Here is what I've made for two:


Grilled meal

Ingredients
  • 3 medium onions, sliced, 1 cm (0.4 in)
  • 2 chipolata sausages
  • 1 bellpepper, in strips
  • 1 zucchini, in 1 cm (0.4 in) slices
  • 2 eggplants, sliced, 1 cm (0.4 in)
  • 3 finely chopped cloves of garlic
  • 1 bit of olive oil (you can mix the garlic with olive oil on forehand to release the taste better)
  •  Himalaya salt

Royalty Free Stock Photography
           

1. Top the eggplants with the garlic and olive oil.
2. Sprinkle salt over the eggplant and the zucchini.
3. Grill it all until done; the veggies will be ready around the same time as the meat. I didn't need to add oil because it is a non-stick grill. Make sure the onions are cooked through and the sausage doesn't release any liquid anymore. The zucchini doesn't need the grill marks to be ready.

If you want some carby side, clean the grill with fresh bread or sprinkle the juicy deliciousness over freshly made rice (or us it along with a bit of oil to fry yesterday's), otherws drizzle the juice over the veggies.

P.S.: It is a great cutlery-free picnic food!

Friday, June 6, 2014

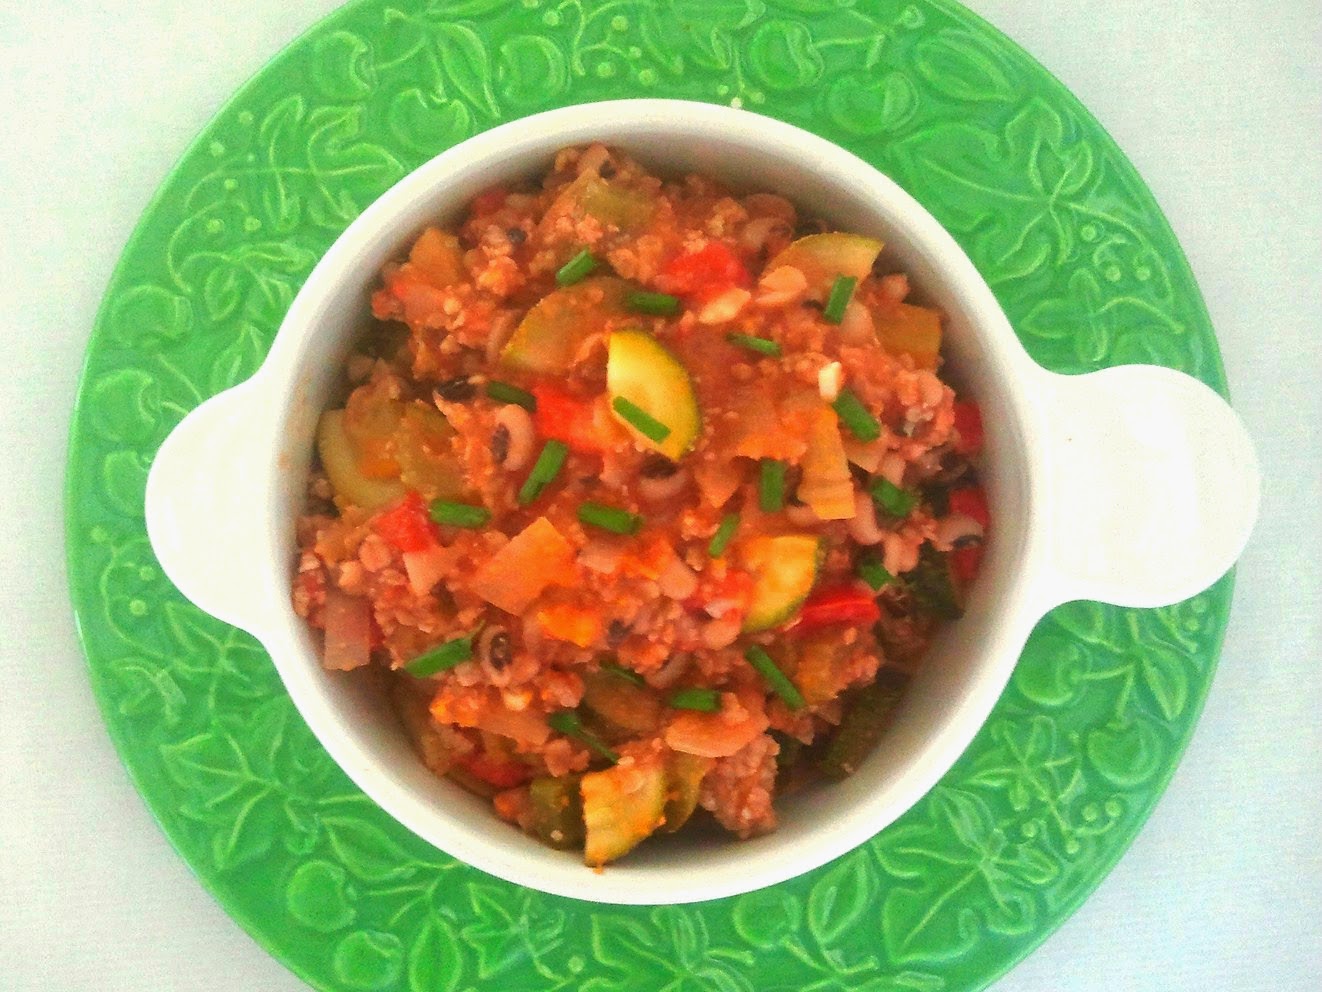
Black eyed peas healthy chili


I remember the first time I ate chili; we were starving after hitching to the Sfinks world music festival in Boechout, close to Antwerpen, and food was not allowed inside so we had to drop our bags at a nearby bar (not that we didn't at before coming in, but hitching can use a lot of energy!). There were wonderful food stalls and the most appropriate fuel there was chili (can't survive on pancakes!)

It was our last money and it was well spent :-) We had train tickets for after those two days partying and hanging out with supernice long-time-no-see friends of my husband and sleeping in the bushes after walking around in the middle of the night. We were planning to go picking cherries afterwards but it was raining like something broke up there and we didn't go (I'm glad, I'd pass out after arriving, I was really tired).

Royalty Free Stock Photography

We lived on a few pots of chili and that was a great fuel; in the morning I even tried to reproduce it with cans of foods but there is nothing that beats slowly simmred chili, where the flavors really brew and blend like there is no tomorrow. But there is always tomorrow, tomorrow's chili and tomorrow's party (even if that means being cozy in the couch with buttery popcorn). The chili you cook today is tomorrow's, because even though it is amazing and mouthwatering when freshly cooked, it is twice as much in the next day, or at least a few hours later. It was a little on the dry side but very tasty anyway! I will definately make it again.

Well, I love foods that bring sweet memories. I created my own version of chili (with a bit similar flavors but more and different veggies), after buying a package of black eyed peas in the new Turkish shop here. I have never eaten it before, so I had no clue what to do with it.


Here it is:


Black eyed peas healthy chili

Yield: 5 portions (at least)
Ingredients
  • 1 cup (dried)/2 cans black eyed peas
  • 1 big chili pepper or a couple of small ones (can always add chili powdr later)
  • 2-3 cloves of garlic
  • 1 tsp cumin (powder)
  • 2 medium onions
Cooking Directions
  1. If cooking the black eyed peas from scratch: Soak them for 6 hours or overnight, drain and rinse well. Canned: Jump to step 5
  2. Add fresh water, without salt otherwise they will stay hard (it will be added later in the chili)
  3. Bring the beans to a boil, and lower the fire. Add the pork to a pot and meanwhile chop all the veggies, keeping the tomatoes and courgettes/zucchinis apart..
  4. Let it simmer for half an hour to forty five minutes. When almost perfectly soft, drain
  5. Put the pork in a pot, stirring a bit to separate while it is over the fire in the lowest setting
  6. This will make a bit of the fat melt so you can use it to fry everything.
  7. When you see some of the fat melted in the bottom of the pot, add all the veggies, except for the courgette and tomato.
  8. Fry everything in medium high fire until the onion is soft
  9. Add everything else along with salt
  10. Adding an extra can of tomatoes will make it stewier
  11. Let simmer for at least 15 minutes, 25 is better
  12. If you want it spicier add extra dried chili
  13. Enjoy :-)
I got a little help to make a "studio" for my food photo shooting; I will get an extra lamp and looking forward to a decent camera too. It's a lot more of an detailed part of food blogging than I ever thought.