Pages

Showing posts with label Veggies. Show all posts

Wednesday, October 15, 2014

Carrot cake

You won't need any other cake recipe. Cake for breakfast. Especially if you have a garden and especially, especially if you have toddles that hang on your skirt or pants every time they see you eating something (nevermind the fact that they already ate almost enough to not to be able to sit up for one hour... I guess I know who An inherited that from!).

I used yellow carrots which are sweeter than average but all the other times I used orange ones which also made it wonderful. For some reason this has a very subtle hint of orange taste, but only the one with yellow carrots...

I didn't come up with the recipe but I always use overnight soaked raisins in place of canned pineapples and I never ever frost my cakes because they are too pretty to be covered by anything else.

Here is the recipe:

Carrot cake

Friday, August 15, 2014

Yummy garden lentil stew

Quite often I soak lentils with no plans. It just makes me happy to have the possibility of eating freshly cooked lentils without having a mal plan.

I am completely not a meal plan person.

When I think before sleeping about breakfast that is an exception. I am way to driven and drawn by improvisation that I just can't figure out what to make, even for a party. I just make it.

Yesterday I just made lentils, with some veggies from our garden. Did I mention we can't get past all that zucchini? When we think we are finishing someone gives us some. And tomatoes. So many great tomatoes that the fellow gardeners throw away in the compost heap. Onion greens. Why would anyone plant chives and onions if they are going to throw away the onion greens which are, I must say, so crazily similar I would find it hard to distinguish in a soup?

I recommend cracking the coriander with a mortar and pestle but if you are like me and don't have one (and I call myself a cook), put them in a chopping board and crack them with your knuckles or whatever works.

Garden lentil stew

Yield: 3-5 portions
Ingredients
  • 1 cup lentils (soak for a few hours, preferrably more than 6)
  • 1 tbsp coriander seeds, cracked
  • 3 carrots, chopped (a bit more than 1/2 cm, 1/4 in)
  • 1 yellow (or green) zucchini, cubed approximately 2.5 cm, 1 in)
  • 1 stalk onion greens (chives is also great), thinly sliced
Cooking Directions
  1. Cook the lentils with the coriander, until very soft but not yet mushy. Check at 20-25 mins (depends on your stove and your lentils.
  2. Add the carrots and stir.
  3. After two minutes add the zucchini, stir.
  4. Let the zucchini get soft. Add salt to taste.
  5. Add the onion greens, stir and remove pot from the fire.
  6. Let the pot sit, covered, for at least 15 minutes, a great way to blend taste a bit more in any stew.
  7. Serve, drizzle with plenty of olive oil.

Sunday, August 3, 2014

Veggies and pasta stew/soup


The delicious, comforting richness of tomato soup with pasta reminds me of one trip I had with my mother. I think it was the same one when I got the toilet clogged in the hotel and, failing to mention that it was my fault, we actually got an upgrade to a better room :-)

And when I was a child I only ate soup that had pasta in it. No meat. No veggies other than carrot and potato. And definitely no greens. Now my menu is quite richer (especially in veggies), since I have been experimenting with food for six years five of those vegetarian).

I love making things in huge pots; I think this can serve six!

I had put more liquid, I just wanted to show how pretty the veg=gies were :-)
Veggie stew

Ingredients
  • 2 cups canned chopped tomato
  • 3 carrots, chopped
  • 3 onions, peeled and chopped
  • 3 celery stalks, chopped (a bit of the leaves too)
  • 1 garlic clove
  • 1 bit oregano
  • 1 cup elbow pasta
  • 3 tbsp olive oil
Cooking Directions
  1. Fry onions and garlic with oregano in olive oil, in medium high fie, stirring frequently until onions get transparent.
  2. Add celery and keep frying until it starts having a stronger green color.
  3. Add carrot, fry a bit, add the tomato and some water (up to 5 cups to begin with).
  4. Wait for it to boil and add the pasta.
  5. When it boils well, check if there is enough water. To make a watery soup add at least 2 more cups hot water (like from thee tap).
  6. When pasta is al dente, remove and let it sit a few minutes (if you cook the pasta until soft it will be cooked even further since the pot is still hot).
  7. Serve :-)

Tuesday, July 22, 2014

Magret (duck breast), chard and chestnuts


You know those days when you are strolling around the supermarket and find yourself staring at something that you never tried before but heard good things about?

Well, I've had one of those moments the other day. I got duck. More specifically, magret.  Duck breast with a layer of fat. And I had no idea what to do with it.

Here we have a word for these eats, heerlijk. Said heerleeyk.That means divine, but with a lot more foodie appeal. Not that you only can use it for food. It's the way it tastes when you say. Divine sounds more like you are talking about a great piece of music. Or a dress.

Having an nearly endless stream of chard in the garden in this wonder-full fruitful summer, featuring a couple of days of rain and a couple of days of sun and everything all over again - mainly the sun - which veggie wouldn't be excited?

And I figured out the chestnuts I picked and dried last fall were just the perfect starch for this simple but taste bursting meal :-) I'll teach you the best way I found to do that chestnut thing in fall. Now you can find it at a spanish shop (I saw them in the little shop in the little village in Andalucia for the first time like this).

Anyway, here is the recipe:


Magret de canard with chards and chestnuts

Yield: 2 richly filling servings

Ingredients
  • 1 magret
  • 1 cup dried chestnuts, peeled, pick similar sized ones
  • 1 lb chards, chopped
  • 1 tbsp coriander seeds, mashed
  • 1 tsp herbes de provence
Cooking Directions
  1. Rub the magret with the herbs and a bit of salt on all sides.
  2. Start cooking the chestnuts, and boil them for 45 minutes or until soft as you like; wait to drain.
  3. Heat a pan on the lowest heat setting, and let the fatty part of the magret sit there and grease it a little.
  4. Change the setting to high and check after a couple of minutes.
  5. Turn it around when it is dark brown.
  6. Let the other side brown just as much and remove from the fire.
  7. Meanwhile, fry the coriander in 1-2 tbsp lard or what you wish a little bit in the medium setting.
  8. Add the chard, stirring until it wilts.
  9. Drain the chestnuts.
  10. Serve :-)

Friday, July 18, 2014

Veggie nasi goreng - big batch for freezing

Nham :-)


I have always been crazy about fried rice. Having eaten about a truckload of it, I never imagined how much this version would spin me around like we were dancing for a competition.

I actually got to know this one when sleeping over at a friends who lives on gluten (and I barely eat any), and to my surprise he wasn't going to let me live on eggs this time. And that was the start of a passionate love affair (with the nasi goreng I mean :-) ). I had the leftovers the next morning, sizzled in the butter from frying the omelette, and my dear breakfeast was born. By the way, if you want to make a failproof omelette, check this out.

This batch will yield loads of food, so make it for a party or freeze it (or both,depending on the size of the party or the freezer); you can also make 1/4 of it for a regular amount, then use only 1 bell pepper of your choice). Please don't hurt yourself converting everything to perfection; if making 1/4 us 1 clove of garlic on the bigger side and so on.

Veggie nasi goreng

Ingredients
  • 2kg (4lb) rice
  • 9 tbsp coconut oil
  • 1 onion, peeled and chopped
  • 5 cloves garlic, chopped
  • 2 red bell peppers, chopped
  • 2 yellow bell peppers, chopped
  • 5-15 seeded chilis
  • 2 thin leeks, or one regular, sliced (as thick as the flesh of the bell pepper, I wish I had done that)
  • 5-9 carrots, chopped in thin strips or coarsely grated
  • 1kg (2lb) frozen peas
  • 250g (9 oz) soy sprouts (tauge)
  • 1/2 cup kecap manis (I didn't have it, used soy sauce)
  • 3 tbsp turmeric
Cooking Directions
  1. Cook the rice in a giant pot, as instructed here - it will tak longer because of the great volume
  2. Let it cool until at least body temperature (you might want to transfer it to a giant bowl/fridge drawer if you have one). In the meanwhile chop the rest. You might want to ask help :-)
  3. Add the coconut oil to the giant pot, adding the onions and garlic, fry them a bit and then add all the peppers, the leek and the carrots.
  4. Keep stirring and frying until the leek greens look brighter.
  5. Add peas and keep frying.
  6. After 1-2 minutes, add the soy sprouts and the rice (if it is too much for the pot, keep only half or a quarter of the veggies in there, repeating with the rest later.
  7. Fry everything adding the kecap manis (or half or a quarter depending on how much veggies).
  8. Repeat if needed.
  9. Not all the rice needs to be fried, but certainly half and the best is at least two thirds. Stir everything very well with the remaining rice.
  10. Let it cool completely and then freeze in freezer bags.

Thursday, July 10, 2014

Spanakopita, Greek spinach pie

New camera :-) Thanks Els!


I have always been crazy about phyllo dough, which I first had as a sweet (I think it was a banana pie). I never got over it. It is visible on how often I make spanakopita.

Can you imagine someone baking spinach pie 3 times in a week?

That's me, when I like something I have to make it for days in a row until the juice runs out, and then I forget about it for a month or a year. It costs my husband's enthusiasm with certain dishes sometimes (buckwheat soup again???) but I can't help it, it takes over me. One thing I know it will stay in in my kitchen repertoire is buckwheat, but it will certainly be easy to tell each buckie recipe apart. When I make spinach pie it is always mostly the same.

Anyway, I made this a lot whn I was pregnant (my husband got enthousiast for longer than usual, because, well, it is spinach and crumbly feta wrapped around with a soft-in-the-middle-crunchy-in-the-top layer of phyllo dough. Loads of spinach. Tastes nely cheesy. It's a pie. What else could you ask?

Eggs. The eggs hold the spinach together so it doesn't jump in all directions when you bite. It's a clean pie, of the kind you can eat with your hand sitting on a park and not thinking very much about the fact that your pants are white. You can never forget that your pants are white, just admit it. Whatever you eat or drink will rmind you even more. Except for this pie, when you get used to it and trust it like your best friend.

I have no idea where I got this recipe from, I'm sure it was on the internet though; it was a year and a half ago so it's pretty hard to remember; whoever posted it, thanks!

I've added fenugreek and halved the amount of phyllo (I find it just as nice with three layes but the traditional recipe says six, see what you prefer).

I just ate half the pie. Be warned.


Spanakopita (Greek spinach pie)

Ingredients
  • 2 tbsp olive oil
  • 1 tsp fenugreek
  • 1 pinch nutmeg
  • 3 onions
  • 750g (25 oz) spinach, blanched, or frozen and thawed
  • 225g (8 oz) feta cheese
  • 3 eggs
  • 5 tbsp butter
  • 3 phyllo dough sheets, fresh or frozen and thawed
Cooking Directions
  1. Squeeze all the water you can from the spinach (and drink it, it's healthy). This is very important to avoid a soggy bottom; if it is your thing thn squeeze almost all the water, otherwise it becomes soupy.
  2. Fry the onions and the fenugreek until the onions are transparent, stirring constantly.
  3. Add nutmeg and spinach and keep stirring. Don't add salt, the feta will take care of that.
  4. Let it cool and meanwhile prepare the dough.
  5. Phyllo is very delicate, separate them carefully. Nobody is going to care about a couple of rips though (I ripped mine big time on this batch, it is still awesome).
  6. Melt the butter and brush it with a culinary brush into one of the phyllo sheets, or with your fingers, very gently. Make sure it is well spread.
  7. Put another layer of phyllo on top.
  8. Repeat.
  9. Transfer the three layers of phyllo to a round baking pan, open, with thcenter of the phyllo in the center of the pan with 22 cm (9 in) diameter (can be square too but round looks better; I've made both).
  10. Preheat the oven to 180C (350F).
  11. Add the feta to the spinach, mashing everything with your hands (the next time you make it I'm sure this step will drive you crazy, thinking of what is about to come)
  12. When the mixture is cold, add the eggs, mixing it with everything (for that I use a fork).
  13. Add that to the center of the phyllo dough, spreading it evenly.
  14. Wrap the tips of the phyllo around the top of the filling. it doesn't need to cover everything.
  15. Bake it for 50 minutes (check at 45)
  16. Serve and enjoy!

Friday, July 4, 2014

How to make the perfect omelette, every time


There is nothing better than nasi goreng leftovers and an omelette for breakfeast.

Yes, breakfeast. Started as a typo but i just realized that maybe whoever wrote the word first, this one, had a serious typo. It's just the best meal of the day (alright, dinner too...). I can't grasp that I grew up eating white bread with margarine for breakfast. These things you just don't do to yourself. Do yourself justice.

Anyway, eggs will keep you full and load you with protein so you can have a great active day without craving food after two hours, and a nasi goreng loaded with veggies will help you in the kick. The rice is just yummy :-) I fry the omelette, put it in my plate, and follow with addind the nasi goreng to the hot, buttery pan and let it sizzle for a bit while stirring, and smelling all the warm spicyness in the air.

I had a lot of unintentional scrambled eggs before I saw Kris, a friend of our best friend making an omelette; I based my method on his (it's almost the same). Thanks :-)

The perfect omelete recipe (amount per person)

Ingredients
  • 3 eggs
  • 1 bit salt
  • 2 tbsp butter
  • A bit of filling (optional)
  • A spatula
  • A skillet, plain, inclined sides, flat bottom. Very important!
Cooking Directions
  1. Add butter to the skillet, enough to cover the pan bottom with minimal swirling.
  2. Beat the eggs in a bowl with a tiny bit of salt. Make it 3 at a time if you are making for more people to ensure equally sized omelettes.
  3. When the butter is very hot (after it has been crackling for a while, careful to not to burn too much (a bit is fine), pour the beaten eggs in and wait until it's almost completely solidified.
  4. Add then the fillings of your choice if any. If you want to fold the omelette, add fillings only to half of it. You can even make an omelette pizza with tomato sauce, cheese and whatever :-)
  5. If you want to fold, this is the time. If you want flip, throwing it in the air, do it at your own risk - better train with pancakes first until you get the hang of it, they don't break as easy.
  6. Let it fry a few seconds more (if with cheese, make sure it's melted)
  7. Slide a spatula underneath to make sure it's all loose and slide into your plate.
Enjoy! What is your favorite omelette filling?

Thursday, June 26, 2014

Buckwheat and veggie yumballs


I have grown up with croquettes, especially the kind with a ham and oozy cheesy filling, enveloped by an oh-so-yummy thin layer of dough, coming in giant (snack bar) and tiny (party) sizes and every time I had a birthday party they were always snatching my attention, and the lucky ones that survived until the next day didn't escape my merciless delight. I at them at school. I ate them in my afternoons out. I ate them whenever I could.

I have made many kinds of croquettes; I started with rice croquettes to use leftovers, when I lived in the mountains and was learning to cook with a guy that teached me to like veggies. I have tried a few times, often making them very spicy for yumminess and digestibility, and today I came up with these.

The food naming police is going to say these aren't croquettes because there is no breadcrumbs involved. You can. I just felt like calling them yumballs because that is what they are. But they are also croquettes to me.

I used leftover homemade baby food (sorry An) from yesterday which was already delicious per se. It consisted from mashed potatoes, carrots and belgian endive (witloof, if you ever come across go for it, it is delicious - if you are into bitter leafy goodness like I am, at least).


I'm a disaster with frying, even more than with baking bread, but this one actually worked (yay!)

Let's get to the business:


Buckwheat and veggies yumballs

Yield: +- 25 balls
Ingredients
  • 2 cups mashed veggies (I used potato, carrot, belgian endive and egg - yes it is a veggie, on this recipe :-) )
  • 1 egg
  • 1/2 cup + extra buckwheat flour
  • 1 tsp-tbsp garlic powder or finely chopped garlic if you like it sharp
  • 1-2 tbsp curry powder
Cooking Directions
  1. Start heating the oil; be sure to not to let it smoke! Steam is fine. My stove has 6 settings, I put it on 5 for coconut oil and lower to 4 when it reaches the right point
  2. Add the egg and the salt and spices to the mashed veggies and mix well.
  3. Add half of the flour, mixing well and adding extra until it forms a dough that doesn't stick to your hands when they are well dried.
  4. Make sure everything is venly mixed.
  5. Throw a tiny piece of dough into the oil when it starts bubbling and if it starts frying right away - like in immediately - then make balls about 1.5" or 3.5 cm diameter (can vary), throwing each one directly into the frying oil, keeping them on a single layer and frying until golden brown. Count on a few minutes.
  6. Fish them with a frying ladle or a fork and put in a plate covered wth a kitchen paper towel to keep them crispy, rolling them around a bit.
  7. Sprinkle with cayenne pepper if you wish.
  8. Yummier when hot but still awesome the next day; it won't be crispy but it will be still full of tasty goodness.

Monday, June 23, 2014

Quinoa with kale

Because it is just delicious!

Fried kale was the only green my mother would be able to get inside my belly. I wasn't crazy about it, but with eating less fake flavors and tasting more the real ones, I fell more and more in love with it. I bet my mother didn't see that coming :-)

Really, this is the best kale recipe I know. Although quite different from my mother's, which uses garlic, it still holds a resemblance to the original since has that kick of the same family - onion!

I personally find that this matches very well with quinoa (as any other edible greens, perhaps a bit more) and a hint of soy sauce might make you go for seconds.

Well, like my mother once said over a giant, scentful, richly sweet jackfruit that we just opened, let's not waste time talking :-)


Quinoa with kale

LingQ


Ingredients
  • 1 cup quinoa
  • 3 cups water
  • 1 big bunch of kale, finely chopped
  • 1-3 onions, chopped
  • 1 bit curcuma (turmeric)
  • 1 drizzle soy sauce (optonal)
Cooking Directions
  1. Add the quinoa and the water to a pot with a matching lid and bring to a boil
  2. Lower the fire and let it simmer for 15 minutes. Meanwhile prepare the kale.
  3. Fry the onions until transparent in a bit of olive oil.
  4. Add the kale, stirring constantly, until it goes soft enough.
  5. Enjoy!

Sunday, June 15, 2014

Grilled meal

The picture says it all :-)
Is there anything better to do with a grill?

The sweet mild onionness lends itself very wll for this recipe that bathes in crafty pastured pork sausage juices, with it's herbiness pulsing from the inside, and the zucchini that feels soft and fresh, the bell pepper that always has a marking presence and the eggplant that embraces the garlic like her own child, not minding all the oily sweat from playing outside.

I recently got a grill + waffle iron + croque monsieur maker and I've been enjoying every moment. It is tiny so I need to use it three times for a plate like this but it is very tasteworthy!

Needless to say I went to make a second batch.

Here is what I've made for two:


Grilled meal

Ingredients
  • 3 medium onions, sliced, 1 cm (0.4 in)
  • 2 chipolata sausages
  • 1 bellpepper, in strips
  • 1 zucchini, in 1 cm (0.4 in) slices
  • 2 eggplants, sliced, 1 cm (0.4 in)
  • 3 finely chopped cloves of garlic
  • 1 bit of olive oil (you can mix the garlic with olive oil on forehand to release the taste better)
  •  Himalaya salt

Royalty Free Stock Photography
           

1. Top the eggplants with the garlic and olive oil.
2. Sprinkle salt over the eggplant and the zucchini.
3. Grill it all until done; the veggies will be ready around the same time as the meat. I didn't need to add oil because it is a non-stick grill. Make sure the onions are cooked through and the sausage doesn't release any liquid anymore. The zucchini doesn't need the grill marks to be ready.

If you want some carby side, clean the grill with fresh bread or sprinkle the juicy deliciousness over freshly made rice (or us it along with a bit of oil to fry yesterday's), otherws drizzle the juice over the veggies.

P.S.: It is a great cutlery-free picnic food!

Friday, June 6, 2014

Black eyed peas healthy chili


I remember the first time I ate chili; we were starving after hitching to the Sfinks world music festival in Boechout, close to Antwerpen, and food was not allowed inside so we had to drop our bags at a nearby bar (not that we didn't at before coming in, but hitching can use a lot of energy!). There were wonderful food stalls and the most appropriate fuel there was chili (can't survive on pancakes!)

It was our last money and it was well spent :-) We had train tickets for after those two days partying and hanging out with supernice long-time-no-see friends of my husband and sleeping in the bushes after walking around in the middle of the night. We were planning to go picking cherries afterwards but it was raining like something broke up there and we didn't go (I'm glad, I'd pass out after arriving, I was really tired).

Royalty Free Stock Photography

We lived on a few pots of chili and that was a great fuel; in the morning I even tried to reproduce it with cans of foods but there is nothing that beats slowly simmred chili, where the flavors really brew and blend like there is no tomorrow. But there is always tomorrow, tomorrow's chili and tomorrow's party (even if that means being cozy in the couch with buttery popcorn). The chili you cook today is tomorrow's, because even though it is amazing and mouthwatering when freshly cooked, it is twice as much in the next day, or at least a few hours later. It was a little on the dry side but very tasty anyway! I will definately make it again.

Well, I love foods that bring sweet memories. I created my own version of chili (with a bit similar flavors but more and different veggies), after buying a package of black eyed peas in the new Turkish shop here. I have never eaten it before, so I had no clue what to do with it.


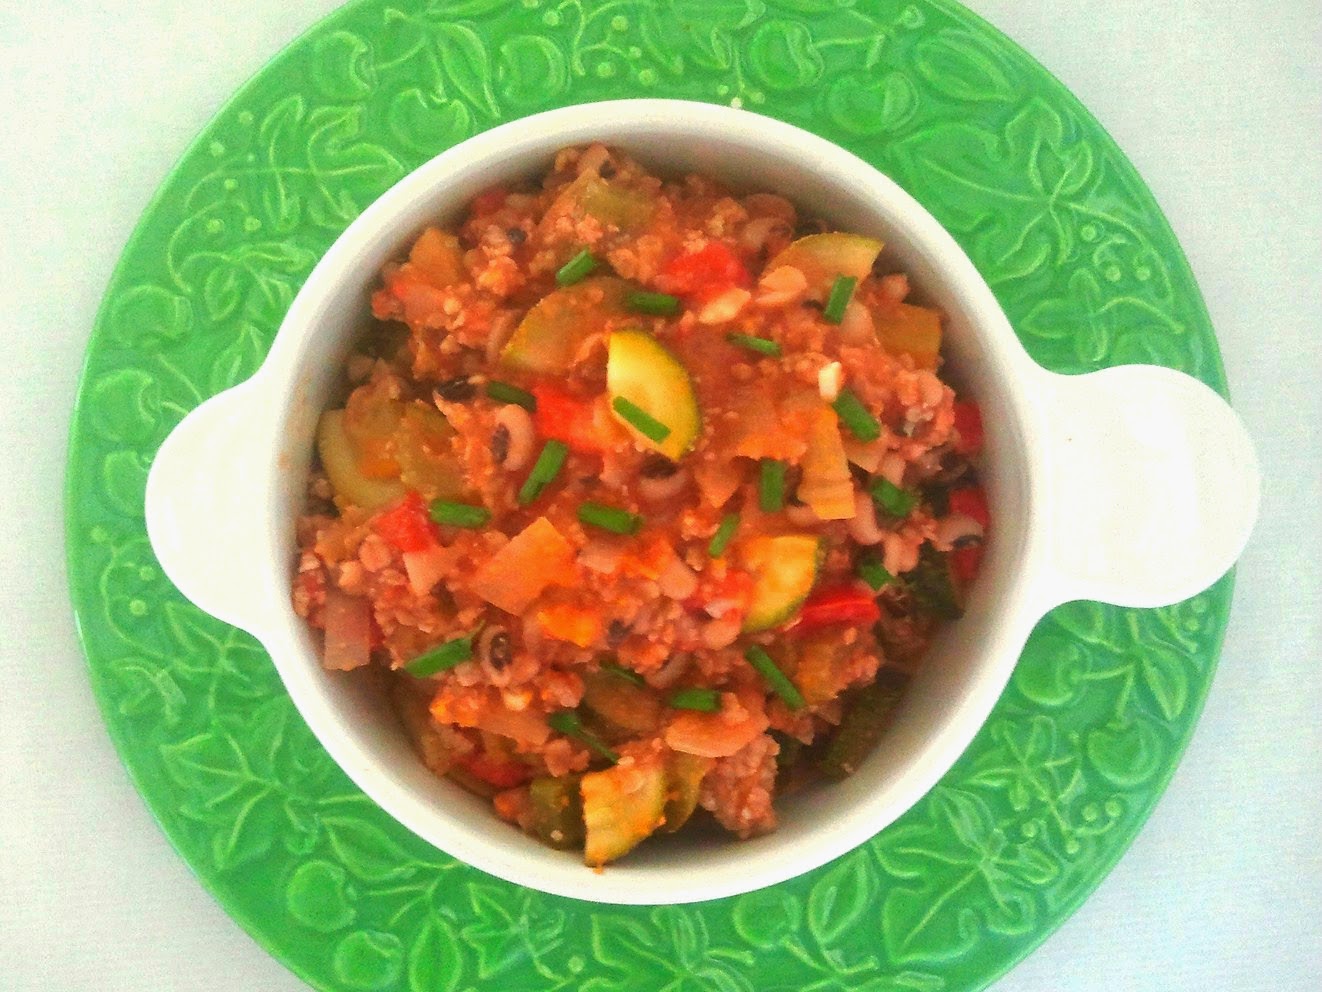
Here it is:


Black eyed peas healthy chili

Yield: 5 portions (at least)
Ingredients
  • 1 cup (dried)/2 cans black eyed peas
  • 1 big chili pepper or a couple of small ones (can always add chili powdr later)
  • 2-3 cloves of garlic
  • 1 tsp cumin (powder)
  • 2 medium onions
Cooking Directions
  1. If cooking the black eyed peas from scratch: Soak them for 6 hours or overnight, drain and rinse well. Canned: Jump to step 5
  2. Add fresh water, without salt otherwise they will stay hard (it will be added later in the chili)
  3. Bring the beans to a boil, and lower the fire. Add the pork to a pot and meanwhile chop all the veggies, keeping the tomatoes and courgettes/zucchinis apart..
  4. Let it simmer for half an hour to forty five minutes. When almost perfectly soft, drain
  5. Put the pork in a pot, stirring a bit to separate while it is over the fire in the lowest setting
  6. This will make a bit of the fat melt so you can use it to fry everything.
  7. When you see some of the fat melted in the bottom of the pot, add all the veggies, except for the courgette and tomato.
  8. Fry everything in medium high fire until the onion is soft
  9. Add everything else along with salt
  10. Adding an extra can of tomatoes will make it stewier
  11. Let simmer for at least 15 minutes, 25 is better
  12. If you want it spicier add extra dried chili
  13. Enjoy :-)
I got a little help to make a "studio" for my food photo shooting; I will get an extra lamp and looking forward to a decent camera too. It's a lot more of an detailed part of food blogging than I ever thought.

Monday, June 2, 2014

Quinoa with spinach and curry


Quinoa is what I call fast food. In lazy days, that is just what I make when I feel like eating something without the chopping galore, and nutritious enough to cheat and call it a meal here and there (hey, if people already call bread with cheese or peanut butter a meal, this counts too! Not everyday of course). Not that I do that. It is just as easy to throw greens on the pot, but if you would be camping that would still b a great meal in case you don't know or can't find wild greens of your liking.

I think you probably heard that before, but quinoa is packed with proteins and minerals and will digest very smoothly. It feels so light it will almost fool you into thinking you didn't eat something very strong (especially if you are a meat eater). But, believe me, you did. You hit the jackpot of starches. Even though I have an undying love for buckwheat as you can see here and here, I must say I find quinoa the ultimate fast-and-almost-no-dishes food. And, of course, it is a great travel food to replenish those 15km (9 miles) you just walked with your heavy backpack.

Well, this is not really a recipe because it's just as easy as making porridge, but maybe you want to know how to make quinoa nicely cooked, what is the nicest ratio, especially after adding water releasing spinach - the difference between making quinoa almost-soup and nice and fluffy (tastes vary but most peopl would agree on this).


Quinoa with spinach and curry

Cook time: 15 minutes
Yield: 2-3 servings
Ingredients


  • 1 cup quinoa
  • 2.5 cups water
  • 150-300g or 5-10 oz spinach
  • curry powder
  • salt (optional)
Cooking Directions
  1. Add quinoa and water to the pot
  2. Bring it to a boil
  3. Lower the fire and let it simmer for around 9 minutes
  4. Add spinach, as much as it takes to almost fill the pot in case it is a small one
  5. Stir it regularly as it cooks, adding the rest of the spinach gradually
  6. If you don't stir there will be an unstirrable layer of spinach on the top in the end :-)
  7. Wait until the quinoa is fully cooked
  8. Sprinkle with curry powder and sea salt (adding salt afterwards or not at all will keep the nutrient content in the spinach high)


Friday, May 30, 2014

Tantalizing leftovers recipe, or pizza rice :-)

Cheesy goodness
That was one of the only two ways my mother would get me to eat rice as a child. I was and still am a picky eater, even though my pickiness has changed through the years (I still do run away from pickled cucumbers!).

I like foods that taste real. Tasting real for me is using only ingredients that are unprocessed (veggies!) or very little processed (cheese). Things that you throw together and make you ask yourself why haven't you made that before, and why on earth people buy boxed macaroni and cheese and why do they eat it after the first bite (hunger is the best pickle, they say).

Well, food taste apart, I think everyone needs to figure out what they really love. I have been in culinary blindness for the first 17 years of my life, because all I ate was made in the same way with th same ingredients. And then I took my little backpack and went out in the world and learned what to do with veggies (about time!). I was already interested in healthy foods, and put my foot in to test the waters before I went roaming around, but it was still fairly limited, and that is one of the things that I felt like keeping from then (with my own addition, my "secret" for nearly everything that tastes good, ahem, veggies!)

This is easy like boiling an egg. You can make that with buckwheat or quinoa too, it is a great way to introduce these foods into your life if you find them odd tasting. Do not underestimate their taste power when you add tomato sauce!


Rice and veggies casserole

Ingredients
  • 1 part leftover rice (I used brown)
  • 1 part veggies (leftover or frozen mix)
  • 1/2 part cheese in cubes
  • Tomato sauce
  • Herbs of your choice
Cooking Directions
  1. Mix everything in a casserole pan (hopefully containing one of the leftovers already to save some dishes!).
  2. Turn on the oven at 350F (180C) and bake for 25 minutes or until cheese melts.
  3. Serve warm.
Well, that is it :-)

I think I start getting the hang of making food photos but there is still a long way to go. Living and learning!

Tuesday, April 29, 2014

Apple and beet salad

My opening post :-)

Beautiful, great tasting and outstandingly nourishing, unusual with a familiar feeling... The slight acidity of the apples and the sharp-ish sweetness of red beets dance really well together in this simple, juicy and revitalizing dish. 

I'm crazy about naturally sweet things, and I found that back in 2011 while couchsurfing with a girl in Linter, Belgium. We went to help someone out with building a strawbale house, transporting burning wood and things like that and after the work we started preparing a feast.

It sounded a little bit weird for me, especially because I used to be a bit uptight with what I would eat, but once I tried, I couldn't help but going for seconds!

It's very easy to make, it's not even a recipe:

Grate red apples and beets (start on a 1:1 ratio and adapt according to your taste), mix them and, if you want it to be a bit less splashy, you can drain the juice (and, by all means, drink it, it's almost een better than the salad). That's it. You can add rocket or ginger if you want some spicyness, it would certainly match well.

Enjoy!