Pages

Friday, May 30, 2014

Making the perfect buttery popcorn


I have grown up on popcorn. Plain, with salt, at 3 in the afternoon, almost every day. I just loved it!

I still do. As a matter of fact, it is one of my standard midnight snack (the other is kuttu ki puri). That is the snack for lazy people, easier than the 5 minutes walk to the shop to get chips and much healthier, besides filling you with not much density so it is easily digestible and it won't hurt your waistline.

I have a little secret here.

If you tried to make popcorn with butter before you know how disappointing it can be to burn your last corn and having all the shops closed or far away. Making popcorn with vegetable oil and making it soggy with butter is not really fun.

My secret ingredient is ghee.  That is clarified butter, or butter fat. The butter is simmereed until the solids separate. I will post a recipe in the future, but I need to make it again (I only post tried and tested recipes and for me it was so long ago that I don't even remember anymore). In the Indian or Asian shops you can find it sometimes cheaper than butter itself, in cans, and since it can be stored at room temperature (as far as the tradition goes, and that is how I do) like olive oil and the like, since it has no water it lasts longer. Make sure you read well the package and that you are buying butter ghee, as they sell shortening as vegetable ghee.


Butter popcorn

Yield: 1 quart/1 liter
Ingredients
  • 1/3 cup popcorn kernels
  • 3 tbsp ghee
  • Salt to taste
  • Pot with fitting lid
  • Bowl (optional)
Cooking Directions
  1. Heat the ghee almost on maximum (wait 2 minutes)
  2. Add 3 popcorn kernels
  3. Put on lid
  4. Wait for them to start popping
  5. If they don't after 2 minutes and burn add other 3 kernels, they will pop
  6. When they do add the other kernels, spreading them around so that they are in an even layer
  7. Let them start to pop
  8. If you want to keep them on the pot to save you dishes fill the sink or a heat resistant bowl half as deep as your pot with cold water
  9. If not just sit and enjoy the show
  10. Shake them every two minutes
  11. When there are several (ten to fifteen) seconds between pops add the popcorn to a bowl or pot the pan into the bowl with water.
  12. If you put it in a bowl, enjoy
  13. If you keep it in the pan, wait five to ten minutes and enjoy!
  14. It also works with coconut oil
It's quite easy, and you will probably notice that the ghee will yeld you bigger, airier popcorn. I have tried several oils  (coconut, butter, olive, peanut, sunflower, soya, grapeseed - be careful with refined oils because they carry hexane residues but that is a talk for another post) and ghee deserves by far the first place, and secondly coconut.

I usually make the double for me alone because it is just so good, and it's also great for a picnic in a sunny day (just let it cool down a bit before putting the lid on the container or use a big paper bag after making a couple of small holes in it for thee crunchiest results).

Have fun,

Beet

Tantalizing leftovers recipe, or pizza rice :-)

Cheesy goodness
That was one of the only two ways my mother would get me to eat rice as a child. I was and still am a picky eater, even though my pickiness has changed through the years (I still do run away from pickled cucumbers!).

I like foods that taste real. Tasting real for me is using only ingredients that are unprocessed (veggies!) or very little processed (cheese). Things that you throw together and make you ask yourself why haven't you made that before, and why on earth people buy boxed macaroni and cheese and why do they eat it after the first bite (hunger is the best pickle, they say).

Well, food taste apart, I think everyone needs to figure out what they really love. I have been in culinary blindness for the first 17 years of my life, because all I ate was made in the same way with th same ingredients. And then I took my little backpack and went out in the world and learned what to do with veggies (about time!). I was already interested in healthy foods, and put my foot in to test the waters before I went roaming around, but it was still fairly limited, and that is one of the things that I felt like keeping from then (with my own addition, my "secret" for nearly everything that tastes good, ahem, veggies!)

This is easy like boiling an egg. You can make that with buckwheat or quinoa too, it is a great way to introduce these foods into your life if you find them odd tasting. Do not underestimate their taste power when you add tomato sauce!


Rice and veggies casserole

Ingredients
  • 1 part leftover rice (I used brown)
  • 1 part veggies (leftover or frozen mix)
  • 1/2 part cheese in cubes
  • Tomato sauce
  • Herbs of your choice
Cooking Directions
  1. Mix everything in a casserole pan (hopefully containing one of the leftovers already to save some dishes!).
  2. Turn on the oven at 350F (180C) and bake for 25 minutes or until cheese melts.
  3. Serve warm.
Well, that is it :-)

I think I start getting the hang of making food photos but there is still a long way to go. Living and learning!

Wednesday, May 21, 2014

Simple 5 ingredient gluten free bread

Photo by me
Elated taste buds.

It is real bread, gluten free.

While it worked to make sandwiches with waffles, there is nothing that could compare to a fresh yeast real bread, which I was able to make thanks to Solveig from Gluten Free Vegan Girl. I have tried loads of gluten free bread recipes and that is the only one that made me burst in tears of joy. It is real bread. And gluten free :-)

Royalty Free Stock Photography

I only have one adjustment to suggest; start with three cups of water instead of five. I don't know what superpower psyllium she uses (maybe it is because she uses psyllium powder and I use the husks) but mine is certainly not like that. Psyllium is the thingy playing the role of the gluten, but it is actually good for you and it is even used for helping to flush the intestines.

For the original recipe, check Solveig's recipe here.

Update, May 27: I made them again, and it turned out great! I have put a squeze of fresh orange juice to improve the quality of the dough. Made with 3 cups of water. Bake until very brown on top.

Saturday, May 17, 2014

5 items that will liven up a gluten free pantry

Kuttu ki puri (recipe below), pic by me - use as you wish as long as you link back

After fiddling with a gluten free life for a while, on and off, I figured out some essentials that make my life easier, especially in the past couple of months, when cravings started getting bigger. I have kept myself firm on my eating choices because I feel more and more how eating GF gives me more energy - I used to be always empty of energy and full of things that shouldn't be in me for so long.

While I am not looking forward to eat as much baked goods as before, both for health and practical reasons, I do include some ingredients for it in this list because I, too, help myself out with pastries and sandwiches sometimes, but I am convinced (from experience) that great food can be really easy.

Here are my current top 5 ingredients:

Eggs. Because instead of reaching for a bread, the quick and easy I-am-hungry solution will be those white and yellow bundles of happiness which, by the way, are pre-packed snacks by nature for those active days. Unless you are rich and can afford pre-made gluten-free bread every day, or you are handy enough to bake them yourself all the time, that is the best choice. I don't bother. And eggs are a much more nutritious fuel, by the way. Here is why they will rock your world.

Coconut flakes. It will help feeding your sweet tooth, believe me; and in quite an affordable way if you know where to source your ingredients. I'm talking about making coconut rochers (or macaroons). They are ready in a whisk (and a bake), infinitely easier to prepare and more nutritious than regular standard wheat cookies, and it is a real crowd pleaser. Recipe here.

Rice noodles. Ever present in Asian shops, and definitely more appealing than those corn gluten free pastas in my perception, they are rather affordable (again, know thy shops :-) ). I make pasta sometimes for dinner: a nice veggie tomato sauce (recipe coming up soon), rice pasta for me, wheat pasta for my husband. Quite convenient and you don't have to miss or eat just the sauce with a bit of egg (been there) on a pasta night.

Rice paper. Another great finding from Asian shops, it will give you nice, instant wraps. They are also pretty thin and light so it might be a good travel food, and a yes-yes to take if you are staying over with friends. Great for playing with leftovers and just plain, simple fun! How to wrap it here and how to choose the best rice paper here.

Buckwheat flour. Because making kuttu ki puri is an addiction, and eating it is double as much addictive! Choose the finest flour you can find, read reviews online. I had to wait a while to find a flour that gives the results I want (Doves farm if you live in Europe, I buy it on amazon.co.uk, and I usually hear good things about Bob's Red Mill in general in America). You can also mix half tapioca and half buckwheat and see if it works for you.

Which are your gluten free essentials? Which is your favorite buckwheat flour?

Friday, May 16, 2014

Making yoghurt on a thermos

 http://creativecommons.org/licenses/by-sa/3.0/


I like yoghurt. A lot. I also like to sit back and relax and go to sleep to find myself in the kitchen in the next morning peeking at a fresh batch of yoghurt and that divine good-for-you fermentation scent. I am a yoghurt scent junkie.

And it will save you bucks from buying yoghurt and it will save you space in the kitchen (yay, no need for a yoghurt maker!) and it will save you bucks from buying the machine and it will make you a happy person.

After all, it's an easy way to make yoghurt in small batches, since you are free from the ever-so-lasting temperature checks. It will be fine overnight, you can rest assured, and if your cheapskatiness goes along on your trips you will be glad to have seen this even more.

All you need is:

A thermos bottle/mug (at least 2 cups capacity, preferrably, but works fine if less). If it was used for coffee, wash it until odorless or better choose another, or your yoghurt will smell/taste like it (yikes!)
Milk just enough to almost fill the thermos
1 to tablespoon of plain yoghurt for each 2 or 3 cups (no need to be strict here, just estimate)

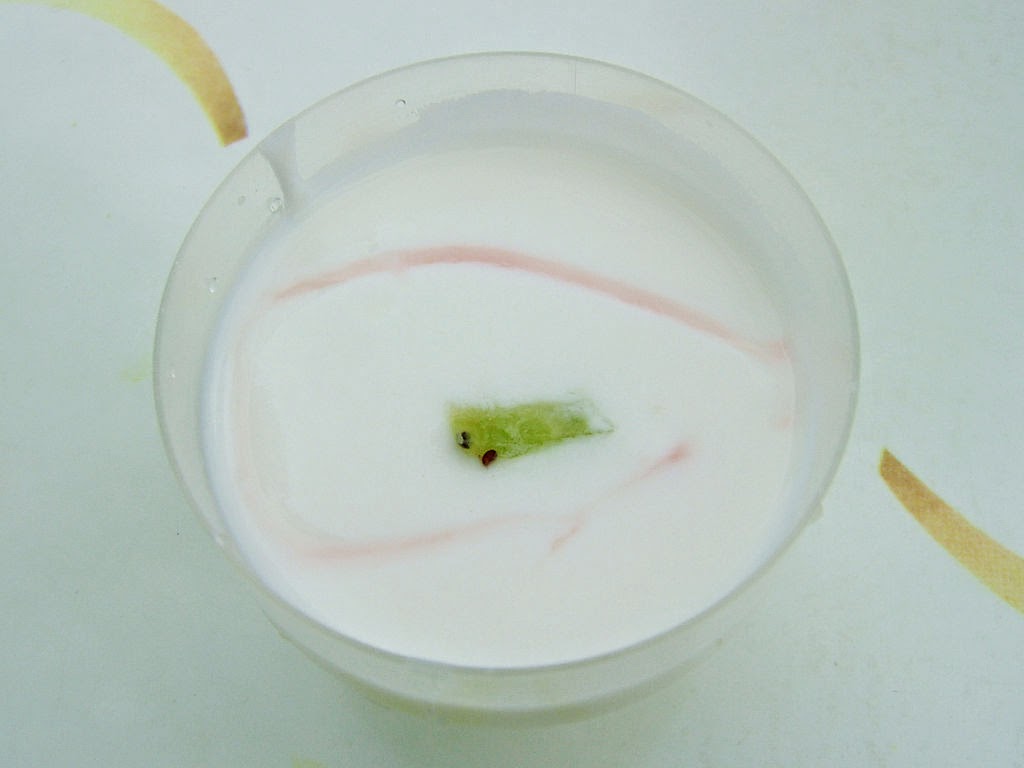
Warm the milk until a tiny bit over the body temperature, but so that you can comfortably hold your finger into it for at least 10 seconds. Add the yoghurt, gently whisking or mixing with a fork until it gets dissolved.
Pour into the thermos, close it leaving the lid in the open mode but still covered, and forget it for 8 to 12 hours (nice thing to make for breakfast!). Check the taste then and if you would rather have it more sour just leave it a bit longer until it gets how you like it and refrigerate or remove the lid so the heat will escape.

Friday, May 9, 2014

Coconut rochers recipe (gluten free), also known as coconut macaroons

Pic by me


Coconut rochers are one of my favorite go-to recipes for my sweet tooth. One of those I don't even remember that is gluten free. What is gluten anyway with these? :-)

Royalty Free Stock Photography

Macaroons are common here in Belgium, ever present in supermarkets and bakeries, but they are so easy to make that I got a 2.5kg (5lb) bag of dried organic coconut so I can make them whenever I want, especially in my in-the-middle-of-the-night baking sessions; it's also rather quickly baked, so you save some firewood/electricity as well in comparison to making, let's say, a cake. And of course you save hassles and inconvenient gluten free flour mixes. It doesn't lump together like regular flour so it will also be easily mixed. And, of course, it costs a fraction from the coconut macaroons in the shop, and they can be endlessly customized!

Coconut rochers recipe

Friday, May 2, 2014

Kuttu ki puri (gluten free buckwheat poori)


I love Indian food. Besides being a spice junkie, I'm enticed about their ability of combining health, yumminess and variety.

I make these very often, for a nice lunch with a raw carrot, cauliflower and spring onions and mayonnaise salad (picture) and a nice green tea; and sometimes to curb my craving for chips with a much more nourishing set of ingredients at midnight while writing. I usually make dough for 2 days.

This kuttu ki puri recipe is usually made with potato to make the dough stick together. That works and it is handy, but I don't feel like cooking and chopping and mashing potato for making kuttu ki puri. So I made the buckwheat poori without potato and it worked :-) I used a very fine buckwheat flour, Doves farm. I'd say, giv it a try buckwheat flour + water and if it falls apart a bit too much add a binding ingredient (aside than potato, a spoon of psyllium husks or an egg and more flour to get the right consistency.

Royalty Free Stock Photography


Kuttu ki puri (gluten free buckwheat poori)

Yield: 2 portions
Ingredients
  • 1 part water or water+egg or mashed potato for coarser flours
  • 2 parts buckwheat flour (depending on the flour you might need quite some more, plus extra for dusting)
  • 1 pinch of salt
  • 1 drizzle olive oil
  • Ghee/coconut oil for frying
Cooking Directions
  1. In a bowl, add flour, water, olive oil and mix well with a fork until it is an even dough, adding more flour if necessary. Let it rest a bit (15 minutes) and take a ball a bit bigger than a cherry tomato, repeating with th rest of the dough, add flour to a little plate and grease your hands a bit with olive oil.
  2. Add the little ball to the flour plate, roll it around a bit to coat it with flour, and flatten it on your hands until thin (you can also use a rolling pin, yet it's easier to know if the dough is sticky when you use your hands). Let the ghee/coconut oil simmer in a frying pan.
  3. Check the ghee/oil for the temperature (add a tiny bit of dough and see if it starts frying immediately), and add the rolled flatbreads one by one (or more if the pan is really big). Fry it until it starts going golden on the side, and turn it around. Fry a minute more, and repeat with all the flatbreads you wish to eat soon. You can keep the rest of the dough for 1 or 2 days in a glass bowl with a lid (avoid sealing it).