Pages

Thursday, June 26, 2014

Buckwheat and veggie yumballs


I have grown up with croquettes, especially the kind with a ham and oozy cheesy filling, enveloped by an oh-so-yummy thin layer of dough, coming in giant (snack bar) and tiny (party) sizes and every time I had a birthday party they were always snatching my attention, and the lucky ones that survived until the next day didn't escape my merciless delight. I at them at school. I ate them in my afternoons out. I ate them whenever I could.

I have made many kinds of croquettes; I started with rice croquettes to use leftovers, when I lived in the mountains and was learning to cook with a guy that teached me to like veggies. I have tried a few times, often making them very spicy for yumminess and digestibility, and today I came up with these.

The food naming police is going to say these aren't croquettes because there is no breadcrumbs involved. You can. I just felt like calling them yumballs because that is what they are. But they are also croquettes to me.

I used leftover homemade baby food (sorry An) from yesterday which was already delicious per se. It consisted from mashed potatoes, carrots and belgian endive (witloof, if you ever come across go for it, it is delicious - if you are into bitter leafy goodness like I am, at least).


I'm a disaster with frying, even more than with baking bread, but this one actually worked (yay!)

Let's get to the business:


Buckwheat and veggies yumballs

Yield: +- 25 balls
Ingredients
  • 2 cups mashed veggies (I used potato, carrot, belgian endive and egg - yes it is a veggie, on this recipe :-) )
  • 1 egg
  • 1/2 cup + extra buckwheat flour
  • 1 tsp-tbsp garlic powder or finely chopped garlic if you like it sharp
  • 1-2 tbsp curry powder
Cooking Directions
  1. Start heating the oil; be sure to not to let it smoke! Steam is fine. My stove has 6 settings, I put it on 5 for coconut oil and lower to 4 when it reaches the right point
  2. Add the egg and the salt and spices to the mashed veggies and mix well.
  3. Add half of the flour, mixing well and adding extra until it forms a dough that doesn't stick to your hands when they are well dried.
  4. Make sure everything is venly mixed.
  5. Throw a tiny piece of dough into the oil when it starts bubbling and if it starts frying right away - like in immediately - then make balls about 1.5" or 3.5 cm diameter (can vary), throwing each one directly into the frying oil, keeping them on a single layer and frying until golden brown. Count on a few minutes.
  6. Fish them with a frying ladle or a fork and put in a plate covered wth a kitchen paper towel to keep them crispy, rolling them around a bit.
  7. Sprinkle with cayenne pepper if you wish.
  8. Yummier when hot but still awesome the next day; it won't be crispy but it will be still full of tasty goodness.

Monday, June 23, 2014

Quinoa with kale

Because it is just delicious!

Fried kale was the only green my mother would be able to get inside my belly. I wasn't crazy about it, but with eating less fake flavors and tasting more the real ones, I fell more and more in love with it. I bet my mother didn't see that coming :-)

Really, this is the best kale recipe I know. Although quite different from my mother's, which uses garlic, it still holds a resemblance to the original since has that kick of the same family - onion!

I personally find that this matches very well with quinoa (as any other edible greens, perhaps a bit more) and a hint of soy sauce might make you go for seconds.

Well, like my mother once said over a giant, scentful, richly sweet jackfruit that we just opened, let's not waste time talking :-)


Quinoa with kale

LingQ


Ingredients
  • 1 cup quinoa
  • 3 cups water
  • 1 big bunch of kale, finely chopped
  • 1-3 onions, chopped
  • 1 bit curcuma (turmeric)
  • 1 drizzle soy sauce (optonal)
Cooking Directions
  1. Add the quinoa and the water to a pot with a matching lid and bring to a boil
  2. Lower the fire and let it simmer for 15 minutes. Meanwhile prepare the kale.
  3. Fry the onions until transparent in a bit of olive oil.
  4. Add the kale, stirring constantly, until it goes soft enough.
  5. Enjoy!

Sunday, June 15, 2014

Grilled meal

The picture says it all :-)
Is there anything better to do with a grill?

The sweet mild onionness lends itself very wll for this recipe that bathes in crafty pastured pork sausage juices, with it's herbiness pulsing from the inside, and the zucchini that feels soft and fresh, the bell pepper that always has a marking presence and the eggplant that embraces the garlic like her own child, not minding all the oily sweat from playing outside.

I recently got a grill + waffle iron + croque monsieur maker and I've been enjoying every moment. It is tiny so I need to use it three times for a plate like this but it is very tasteworthy!

Needless to say I went to make a second batch.

Here is what I've made for two:


Grilled meal

Ingredients
  • 3 medium onions, sliced, 1 cm (0.4 in)
  • 2 chipolata sausages
  • 1 bellpepper, in strips
  • 1 zucchini, in 1 cm (0.4 in) slices
  • 2 eggplants, sliced, 1 cm (0.4 in)
  • 3 finely chopped cloves of garlic
  • 1 bit of olive oil (you can mix the garlic with olive oil on forehand to release the taste better)
  •  Himalaya salt

Royalty Free Stock Photography
           

1. Top the eggplants with the garlic and olive oil.
2. Sprinkle salt over the eggplant and the zucchini.
3. Grill it all until done; the veggies will be ready around the same time as the meat. I didn't need to add oil because it is a non-stick grill. Make sure the onions are cooked through and the sausage doesn't release any liquid anymore. The zucchini doesn't need the grill marks to be ready.

If you want some carby side, clean the grill with fresh bread or sprinkle the juicy deliciousness over freshly made rice (or us it along with a bit of oil to fry yesterday's), otherws drizzle the juice over the veggies.

P.S.: It is a great cutlery-free picnic food!

Friday, June 6, 2014

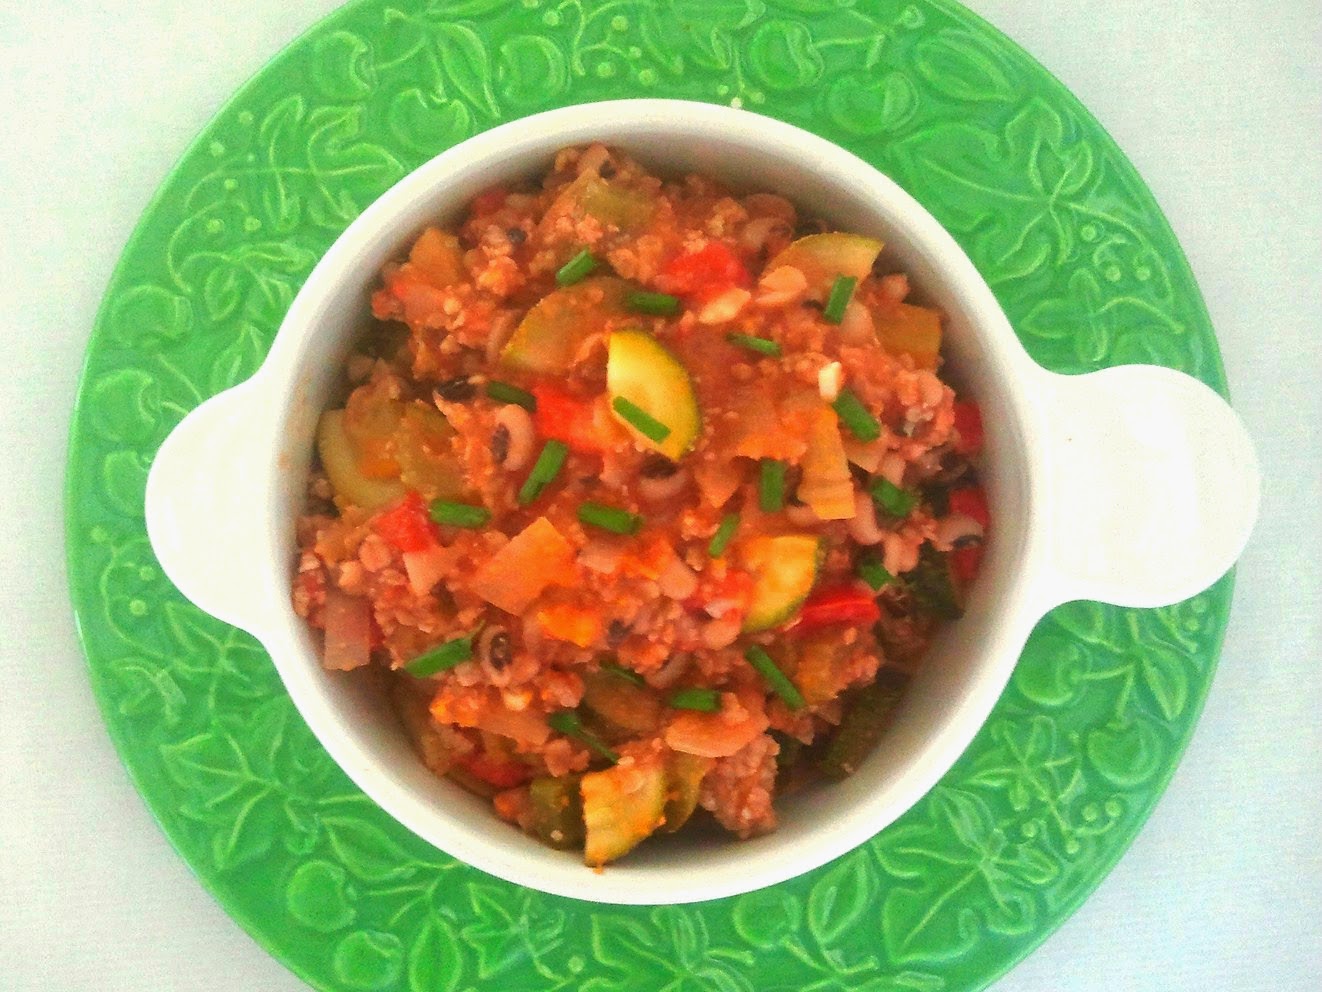
Black eyed peas healthy chili


I remember the first time I ate chili; we were starving after hitching to the Sfinks world music festival in Boechout, close to Antwerpen, and food was not allowed inside so we had to drop our bags at a nearby bar (not that we didn't at before coming in, but hitching can use a lot of energy!). There were wonderful food stalls and the most appropriate fuel there was chili (can't survive on pancakes!)

It was our last money and it was well spent :-) We had train tickets for after those two days partying and hanging out with supernice long-time-no-see friends of my husband and sleeping in the bushes after walking around in the middle of the night. We were planning to go picking cherries afterwards but it was raining like something broke up there and we didn't go (I'm glad, I'd pass out after arriving, I was really tired).

Royalty Free Stock Photography

We lived on a few pots of chili and that was a great fuel; in the morning I even tried to reproduce it with cans of foods but there is nothing that beats slowly simmred chili, where the flavors really brew and blend like there is no tomorrow. But there is always tomorrow, tomorrow's chili and tomorrow's party (even if that means being cozy in the couch with buttery popcorn). The chili you cook today is tomorrow's, because even though it is amazing and mouthwatering when freshly cooked, it is twice as much in the next day, or at least a few hours later. It was a little on the dry side but very tasty anyway! I will definately make it again.

Well, I love foods that bring sweet memories. I created my own version of chili (with a bit similar flavors but more and different veggies), after buying a package of black eyed peas in the new Turkish shop here. I have never eaten it before, so I had no clue what to do with it.


Here it is:


Black eyed peas healthy chili

Yield: 5 portions (at least)
Ingredients
  • 1 cup (dried)/2 cans black eyed peas
  • 1 big chili pepper or a couple of small ones (can always add chili powdr later)
  • 2-3 cloves of garlic
  • 1 tsp cumin (powder)
  • 2 medium onions
Cooking Directions
  1. If cooking the black eyed peas from scratch: Soak them for 6 hours or overnight, drain and rinse well. Canned: Jump to step 5
  2. Add fresh water, without salt otherwise they will stay hard (it will be added later in the chili)
  3. Bring the beans to a boil, and lower the fire. Add the pork to a pot and meanwhile chop all the veggies, keeping the tomatoes and courgettes/zucchinis apart..
  4. Let it simmer for half an hour to forty five minutes. When almost perfectly soft, drain
  5. Put the pork in a pot, stirring a bit to separate while it is over the fire in the lowest setting
  6. This will make a bit of the fat melt so you can use it to fry everything.
  7. When you see some of the fat melted in the bottom of the pot, add all the veggies, except for the courgette and tomato.
  8. Fry everything in medium high fire until the onion is soft
  9. Add everything else along with salt
  10. Adding an extra can of tomatoes will make it stewier
  11. Let simmer for at least 15 minutes, 25 is better
  12. If you want it spicier add extra dried chili
  13. Enjoy :-)
I got a little help to make a "studio" for my food photo shooting; I will get an extra lamp and looking forward to a decent camera too. It's a lot more of an detailed part of food blogging than I ever thought.

Monday, June 2, 2014

Quinoa with spinach and curry


Quinoa is what I call fast food. In lazy days, that is just what I make when I feel like eating something without the chopping galore, and nutritious enough to cheat and call it a meal here and there (hey, if people already call bread with cheese or peanut butter a meal, this counts too! Not everyday of course). Not that I do that. It is just as easy to throw greens on the pot, but if you would be camping that would still b a great meal in case you don't know or can't find wild greens of your liking.

I think you probably heard that before, but quinoa is packed with proteins and minerals and will digest very smoothly. It feels so light it will almost fool you into thinking you didn't eat something very strong (especially if you are a meat eater). But, believe me, you did. You hit the jackpot of starches. Even though I have an undying love for buckwheat as you can see here and here, I must say I find quinoa the ultimate fast-and-almost-no-dishes food. And, of course, it is a great travel food to replenish those 15km (9 miles) you just walked with your heavy backpack.

Well, this is not really a recipe because it's just as easy as making porridge, but maybe you want to know how to make quinoa nicely cooked, what is the nicest ratio, especially after adding water releasing spinach - the difference between making quinoa almost-soup and nice and fluffy (tastes vary but most peopl would agree on this).


Quinoa with spinach and curry

Cook time: 15 minutes
Yield: 2-3 servings
Ingredients


  • 1 cup quinoa
  • 2.5 cups water
  • 150-300g or 5-10 oz spinach
  • curry powder
  • salt (optional)
Cooking Directions
  1. Add quinoa and water to the pot
  2. Bring it to a boil
  3. Lower the fire and let it simmer for around 9 minutes
  4. Add spinach, as much as it takes to almost fill the pot in case it is a small one
  5. Stir it regularly as it cooks, adding the rest of the spinach gradually
  6. If you don't stir there will be an unstirrable layer of spinach on the top in the end :-)
  7. Wait until the quinoa is fully cooked
  8. Sprinkle with curry powder and sea salt (adding salt afterwards or not at all will keep the nutrient content in the spinach high)